2d Platformer
This is just one example. There is no "correct" way. There's whatever works for your game. Maybe you'd like to make it so players tilt their phone left or right to move their character and shake it to jump. It's really up to you.
You can download this sample here.
Note: You should consider checking out the HappyFunTimes Unity GamePad example which is easier than this sample. This sample is still 100% valid and serves as a good example of doing everything with custom code.
A short explaination:
This sample is based on one of the Unity tutorials. If you haven't already I suggest you go through those tutorials as they will help you get familar with Unity and the code. Then the stuff below will just cover some of the things that needed to change.
The first thing we need to do is design a controller to run on the phone.
HTML
First the HTML in Assets/WebPlayerTemplates/HappyFunTimes/controller.html
<div id="buttons" class="hft-fullsize">
  <div class="button" id="left"><img src="images/hft-left-arrow-button.svg" /></div>
  <div class="button" id="right"><img src="images/hft-right-arrow-button.svg" /></div>
  <canvas id="avatar"></canvas>
  <div class="button" id="up"><img src="images/hft-up-arrow-button.svg" /></div>
</div>
Above we can see there's a buttons area. It will be made fullsize. Inside it are 4
parts. A left, right, and up butotn. and a canvas where we can draw our avatar.
There's also this part which will show if the phone is in portrait mode.
<!-- hft-portrait only shown if he phone is in portrait mode -->
<div id="hft-portrait" class="hft-fullsize hft-fullcenter">
<div class="hft-portrait-rot90">
<div class="hft-instruction">
Turn the Screen
</div>
<div class="hft-xlarge">
↺
</div>
</div>
</div>
It basically tells users to turn their phone on the side. Hopefully as HTML5 progresses we'll be able to get rid of this need.
CSS
The corresponding CSS from Assets/WebPlayerTemplates/HappyFunTimes/css/controller.css
#buttons {
    position: absolute;

    /* make sure the user dragging their fingers or the mouse point
       doesn't select anything */
    -moz-user-select: none;
    -webkit-user-select: none;
    -o-user-select: none;
    user-select: none;
}
Next we define buttons, their size, that they are absolutely positioned and then set their positions
.button {
    width: 110px;
    height: 110px;
    text-align: center;
    font-size: 70px;
    font-family: Helvetica, Arial, sans-serif;
    font-weight: bold;
    bottom: 60px;
    position: absolute;
}
#left {
  left: 20px;
}
#right {
  left: 140px;
}
#up {
  right: 20px;
}
and we do the same for the avatar canvas
#avatar {
  position: absolute;
  left: 50%;
  bottom: 130px;
  width: 128px;
  height: 128px;
}
This code moves the buttons and the avatar canvas if the screen is really small
@media only screen and (max-height : 208px) {
    .button {
        bottom: 22px;
    }
    #avatar {
      left: 56%;
      width: 64px;
      height: 64px;
      bottom: 52px;
    }
}
JavaScript
And the JavaScript from Assets/WebPlayerTemplates/HappyFunTimes/scripts/controller.js
This part says which libraries to include. The first part is the path to each
library. The second part is a list of variables to assign the libraries to.
The ones that start with hft/ are part of HappyFunTimes and are
documented here. The rest are part of this sample.
// Start the main app logic.
requirejs(
  [ 'hft/commonui',
    'hft/gameclient',
    'hft/misc/input',
    'hft/misc/misc',
    'hft/misc/mobilehacks',
    'hft/misc/touch',
    '../3rdparty/hft-utils/dist/audio',
    '../3rdparty/hft-utils/dist/imageloader',
    '../3rdparty/hft-utils/dist/imageutils',
  ], function(
    CommonUI,
    GameClient,
    Input,
    Misc,
    MobileHacks,
    Touch,
    AudioManager,
    ImageLoader,
    ImageUtils) {
We have some code to send a message to Unity for when the place presses left or right.
var g_leftRight = 0;
var g_oldLeftRight = 0;

function handleLeftRight(pressed, bit) {
  // Clear the bit for this direction and then set it if pressed is true.
  g_leftRight = (g_leftRight & ~bit) | (pressed ? bit : 0);
  // Only send if anything has changed.
  if (g_leftRight != g_oldLeftRight) {
    g_oldLeftRight = g_leftRight;

    // send a direction (-1, 0, or 1)
    g_client.sendCmd('move', {
        dir: (g_leftRight & 1) ? -1 : ((g_leftRight & 2) ? 1 : 0),
    });
  }
};
Similarly we have a function for jumpping
var g_jump = false;

function handleJump(pressed) {
  // Only send it if it has changed
  if (g_jump != pressed) {
    g_jump = pressed;
    g_client.sendCmd('jump', {
        jump: pressed,
    });
  }
};
We then connect those functions to keys for when testing in a desktop browser
var keys = { };
keys[Input.cursorKeys.kLeft]  = function(e) { handleLeftRight(e.pressed, 0x1); }
keys[Input.cursorKeys.kRight] = function(e) { handleLeftRight(e.pressed, 0x2); }
keys["Z".charCodeAt(0)]       = function(e) { handleJump(e.pressed);           }
Input.setupKeys(keys);
And we connect them to the various HTML elements for our buttons
Touch.setupButtons({
  inputElement: $("buttons"),   // element receiving the input
  buttons: [
    { element: $("left"),  callback: function(e) { handleLeftRight(e.pressed, 0x1); }, },
    { element: $("right"), callback: function(e) { handleLeftRight(e.pressed, 0x2); }, },
    { element: $("up"),    callback: function(e) { handleJump(e.pressed);           }, },
  ],
});
Note that we use one element to receive all the input. Touch.setupButtons will look at
where each button element is and call the corresponding function.
We also have some code for drawing the avatar.
First off we load the avatar image and we don't actually start running the controller until that image has loaded
var images = {
  idle:  { url: "images/bird.png", },
};

ImageLoader.loadImages(images, startClient);
We setup a GameClient
g_client = new GameClient();
And assign a function to call when we're told what color the player is
g_client.addEventListener('setColor', handleSetColor);
That function looks like this
function handleSetColor(msg) {
  // Look up the canvas for the avatar
  var canvas = $("avatar");

  // Get the size it's displayed by CSS and make
  // it's internal dimensions match.
  var width = canvas.clientWidth;
  var height = canvas.clientHeight;
  canvas.width = width;
  canvas.height = height;

  // Now get a context so we can draw on it.
  var ctx = canvas.getContext("2d");

  // Adjust the avatar's hue, saturuation, value to match whatever color
  // we chose.
  var coloredImage = ImageUtils.adjustHSV(images.idle.img, msg.h, msg.s, msg.v, msg.range);

  // Scale the image larger. We do this manually because the canvas API
  // will blur the image but we want a pixelated image so it looks "old skool"
  var frame = ImageUtils.scaleImage(coloredImage, 128, 128);

  // Draw it in the canvas and stretch it to fill the canvas.
  ctx.drawImage(frame, 0, 0, ctx.canvas.width, ctx.canvas.height);
};
Now on the game side, in Unity.
We're using the Character Controller example which was written in UnityScript.
It's in Assets/HappyFunTimes/Scripts/Example3rdPersonController.js
There isn't much too it. It's basically the same code from the Unity tutorials. For HappyFunTimes we needed to add a few functions.
LevelManager / PlayerSpawner
Select the LevelManager object from the scene.
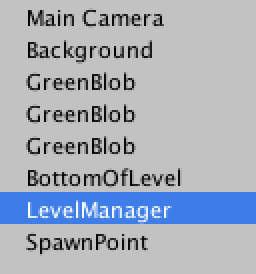
Notice the PlayerSpawer. PlayerSpawner is a standard HappyFunTimes component. There should
only be one per scene. It spawns a prefab each time a player connects to HappyFunTimes with their phone.
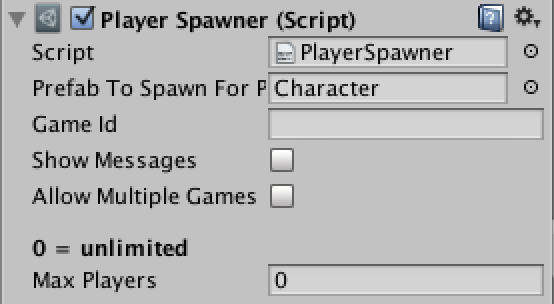
You can see the spawns the prefab Character.
Character
Select the Character prefab from HappyFunTimes/prefabs/Character
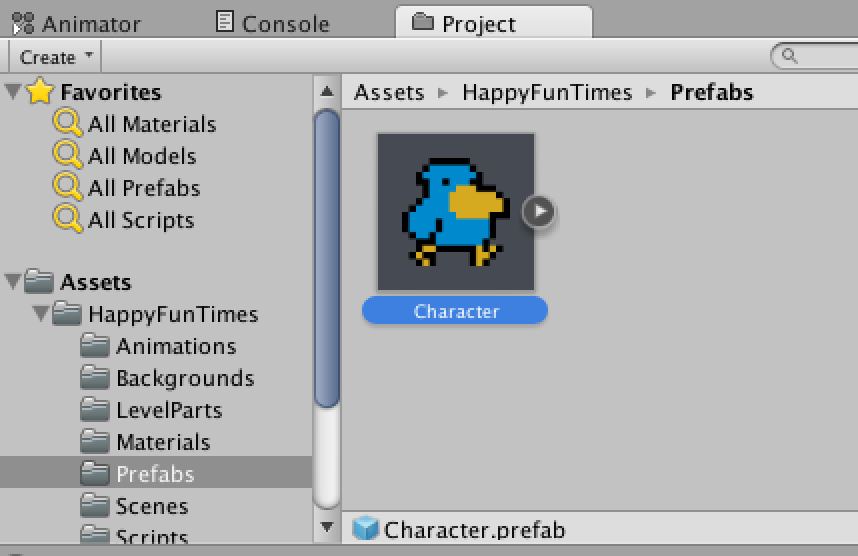
Looking inside the character you can see it uses the BirdScript
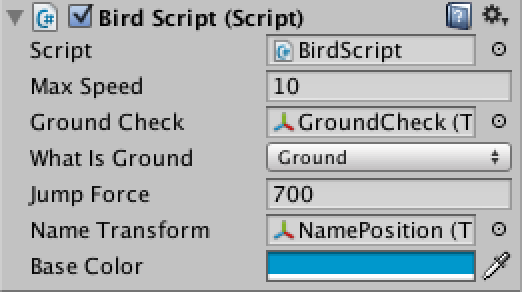
BirdScript
BirdScript.cs is basically the same code from the unity tutorial
with a few additions for HappyFunTimes
InitializeNewPlayer
This function is called anytime a new player is created by the PlayerSpawner.
// Manages the connection between this object and the phone.
private NetPlayer m_netPlayer;

// Called when player connects with their phone
void InitializeNetPlayer(SpawnInfo spawnInfo)
{
    Init();

    m_netPlayer = spawnInfo.netPlayer;
    m_netPlayer.OnDisconnect += Remove;
    m_netPlayer.OnNameChange += ChangeName;

    // Setup events for the different messages.
    m_netPlayer.RegisterCmdHandler<MessageMove>("move", OnMove);
    m_netPlayer.RegisterCmdHandler<MessageJump>("jump", OnJump);

    MoveToRandomSpawnPoint();

    SetName(m_netPlayer.Name);

    // Pick a random amount to adjust the hue and saturation
    float hue = Random.value;
    float sat = (float)Random.Range(0, 3) * -0.25f;
    MessageSetColor color = new MessageSetColor(
        hue,
        sat,
        0.0f,
        m_material.GetFloat("_HSVRangeMin"),
        m_material.GetFloat("_HSVRangeMax"));
    SetColor(color);

    // Send it to the phone
    m_netPlayer.SendCmd("setColor", color);
}
The code above is very straight forward. First m_netPlayer is set to the NetPlayer object
that represents the connection between the user's phone and Unity.
It then sets up several callbacks. Call Remove if the phone disconnects. Call ChangeName if
the user changes their name. Call OnMove if we receive the "move" command we created
above. Call OnJump if we receive a "jump" command we created above.
Then call SetName with the user's current name. Pick a random color, use it to set the
color of our character and the color of the name label and finally send what we picked
to the phone.
Messages received from the phone
We need to define classes to receive the data we defined above from the phone
// Message when player presses or release jump button
private class MessageJump
{
    public bool jump = false;
}

// Message when player pressed left or right
private class MessageMove
{
    public int dir = 0;  // will be -1, 0, or +1
}
We use those messages in OnMove and OnJump whic just set a few variables.
void OnMove(MessageMove data)
{
    m_direction = data.dir;
}

void OnJump(MessageJump data)
{
    m_jumpJustPressed = data.jump && !m_jumpPressed;
    m_jumpPressed = data.jump;
}
m_direction will be -1, 0, or 1 depending on if the user is pressing left, right or not at all.
m_jumpPressed will be true if the player is holding the jump button. m_jumpJustPressed will be
true if the player was previously not pressing the button but now is. It's cleared in Update.
We look at these in Update and FixedUpdate which are just modified versions from the
tutorial.
void Update()
{
    // If we're on the ground AND we pressed jump (or space)
    if (m_grounded && (m_jumpJustPressed || Input.GetKeyDown("space")))
    {
       ...

void FixedUpdate () {
   ...

   // Get left/right input (get both phone and local input)
   float move = m_direction + Input.GetAxis("Horizontal");
Reading the keyboard using Input.GetXXX is just there to make it easy to test, debug, and interate.
We can start unity, open a local browser window and go to http://localhost:18679. Once we do that
we can switch back to unity and just press the arrow and space bar to test the game's physics and stuff.
If we stop unity and start it again that local browser will re-connect automatically so we can continue
to test just using the keyboard.
Messages sent to the phone
To send our color choice to the phone we define a class for that
// Message to send to phone to tell it the color of the avatar
// Note that it sends an hue, saturation, value **adjustment**
// meaning that RGB values are first converted to HSV where H, S, and V
// are each in the 0 to 1 range. Then this adjustment is added to those 3
// values. Finally they are converted back to RGB.
// The min/max values are a hue range. Anything outside that range will
// not be adjusted.
private class MessageSetColor
{
    public MessageSetColor() { }  // for deserialization
    public MessageSetColor(float _h, float _s, float _v, float _min, float _max)
    {
        h = _h;
        s = _s;
        v = _v;
        rangeMin = _min;
        rangeMax = _max;

    }
    public float h; // hue
    public float s; // saturation
    public float v; // value
    public float rangeMin;
    public float rangeMax;
}
Setting the color of the character in Unity
Setting the color used for the character is a little funky. We're using an HSVA shader that lets us selectively adjust the hue, saturation, and value of part of an image based on a hue range. We need to know the base color of the character so we can then apply the adjustments to that color to see what the final color becomes. That color is set manually in Unity.
void SetColor(MessageSetColor colorAdjust) {
    // get the hsva for the baseColor
    Vector4 hsva = ColorUtils.ColorToHSVA(baseColor);

    // adjust that base color by the amount we picked
    hsva.x += colorAdjust.h;
    hsva.y += colorAdjust.s;
    hsva.w += colorAdjust.v;

    // now get the adjusted color.
    Color playerColor = ColorUtils.HSVAToColor(hsva);

    // Create a 1 pixel texture for the OnGUI code to draw the label
    Color[] pix = new Color[1];
    pix[0] = playerColor;
    Texture2D tex = new Texture2D(1, 1);
    tex.SetPixels(pix);
    tex.Apply();
    m_guiStyle.normal.background = tex;

    // Set the HSVA material of the character to the color adjustments.
    m_material.SetVector("_HSVAAdjust", new Vector4(colorAdjust.h, colorAdjust.s, colorAdjust.v, 0.0f));
    m_material.SetFloat("_HSVRangeMin", colorAdjust.rangeMin);
    m_material.SetFloat("_HSVRangeMax", colorAdjust.rangeMax);
}
LevelSettings.cs
The rest of the code in BirdScript should be clear to anyone that's use Unity much or
gone through the 2d platformer tutorial.
That example made an enclosed world. For me, instead, I just used a few locators. They are
attached to the LevelSettings.cs script which is attached to the LevelManager object.
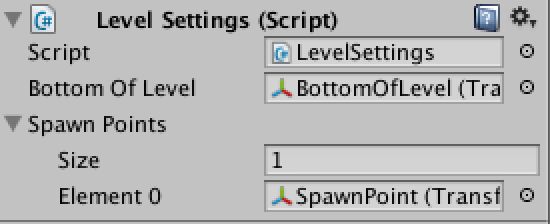
If a player falls below the bottomOfLevel locator then I just respawn them. For respawn points
there is an array of spawnPoints. I only made one in this sample.
The code for LevelSettings.js adds a static accessor, settings. This means any other script
can access the global settings using LevelSettings.settings.<nameOfSetting>.
For example in BirdScript.cs we pick a random spawn point like this
void MoveToRandomSpawnPoint()
{
    // Pick a random spawn point
    int ndx = Random.Range(0, LevelSettings.settings.spawnPoints.Length - 1);
    transform.localPosition = LevelSettings.settings.spawnPoints[ndx].localPosition;
}
And in FixedUpdate we check for the players falling below the bottom of the level like this
if (transform.position.y < LevelSettings.settings.bottomOfLevel.position.y) {
    MoveToRandomSpawnPoint();
}