Unity3D HappyFunTimes Gamepad
The Unity Gamepad example is easiest way to get started with HappyFunTimes in Unity. It provides a bunch of different pre-made controllers with options for a touch controls and for orientation data. Normally it would be up to you to create the controller, the part that runs on the phone, but using this sample is a good way to skip that part if you're looking to get started with HappyFunTimes as quickly as possible.
Once you get the hang of it feel free to modify this sample for new features or look at one of the many other samples. For example if you want to see how a controller (the part on the phone) actually works check out the 2d platformer example
This sample is included with the Unity HappyFunTimes plugin. Or, you can download the plugin here.
Explaination of the code
There are several samples, the one is basically the 2D platformer example from the unity website with HappyFunTimes control added. If you haven't gone through those tutorials I suggest you do that first so you have some idea of what's happening in unity.
Load the scene from HappyFunTimes/Samples/Scenes/2dPlatformScene.
Follow below for an explaintion of the HappyFunTimes parts
LevelManager / PlayerSpawer
Select the LevelManager object from the scene.
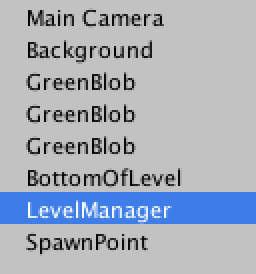
Notice the PlayerSpawer. PlayerSpawner is a standard HappyFunTimes component. There should
only be one per scene. It spawns a prefab each time a player connects to HappyFunTimes with their phone.
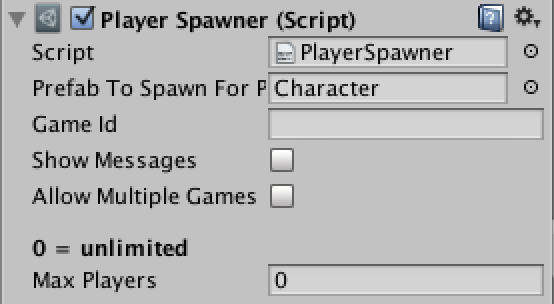
You can see the spawns the prefab Character.
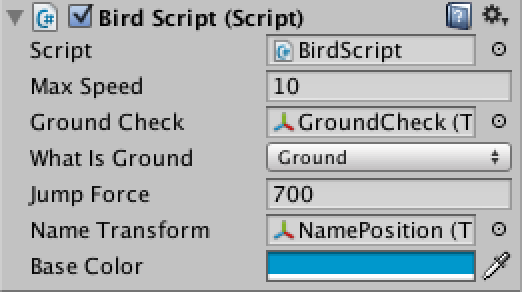
Character
Select the Character prefab from HappyFunTimes/Samples/Prefabs/Character
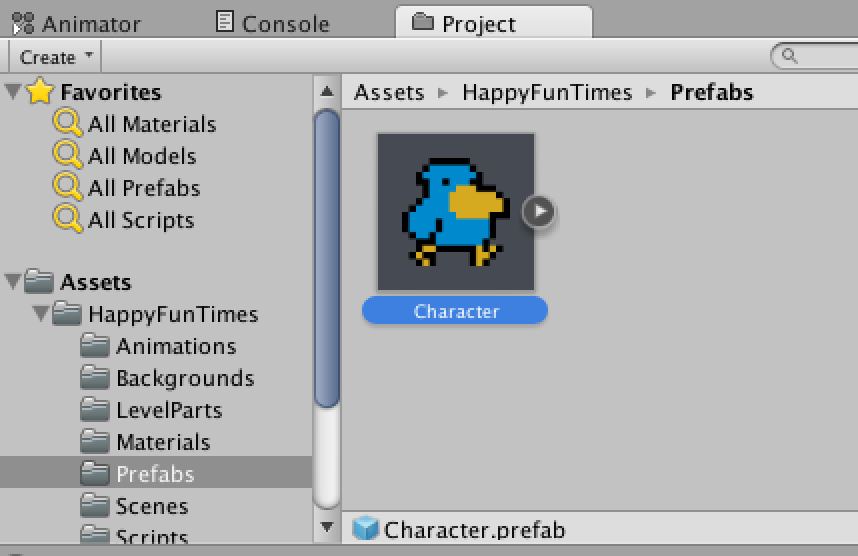
Looking inside the character you can see it uses 3 scripts. One
is HFTGamepad script.

HFTGamepad
The HFTGamepad script lets you select the type of controller you want for your game. The 11 types are

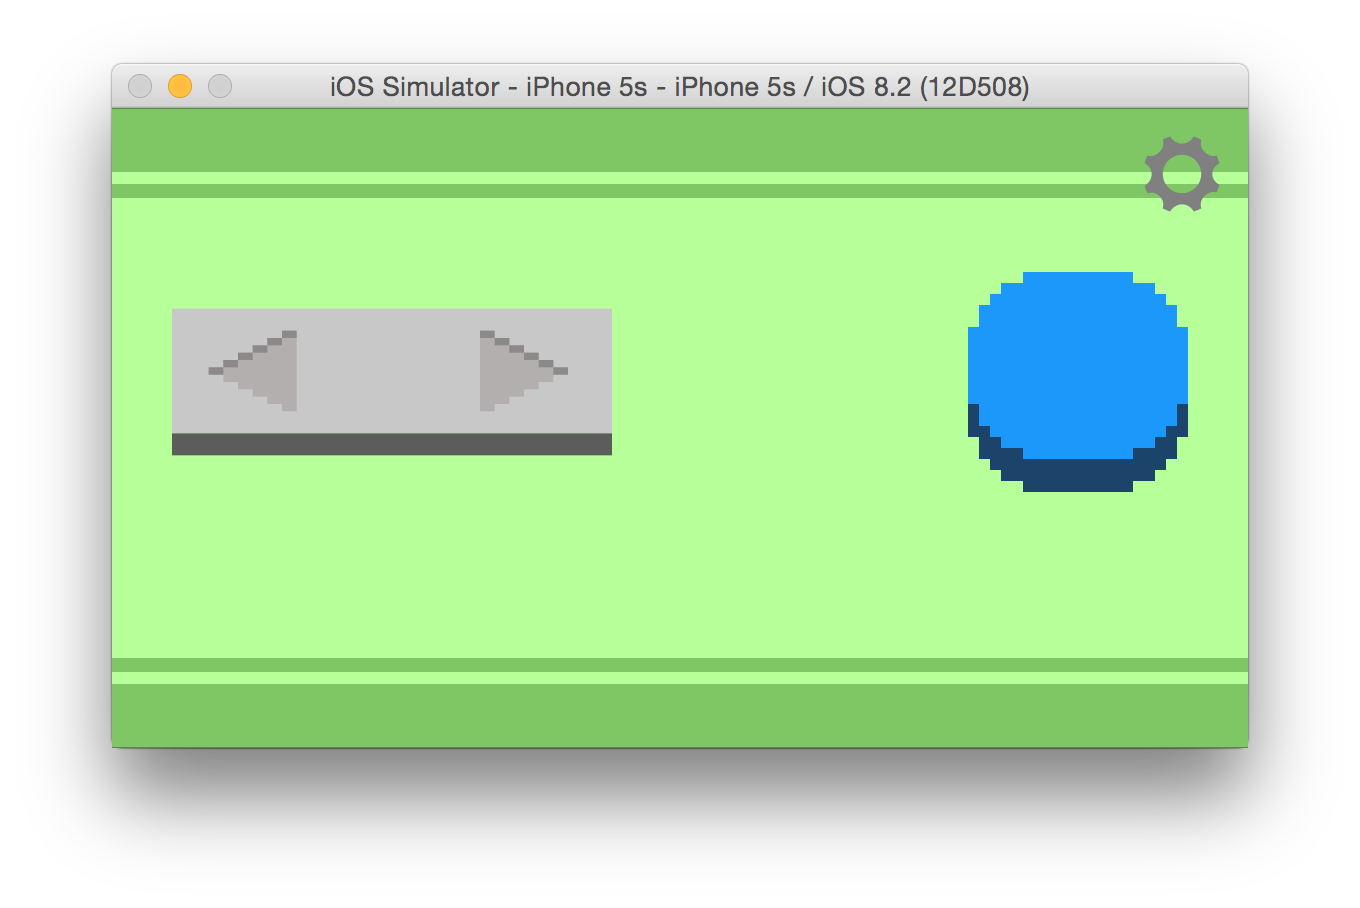

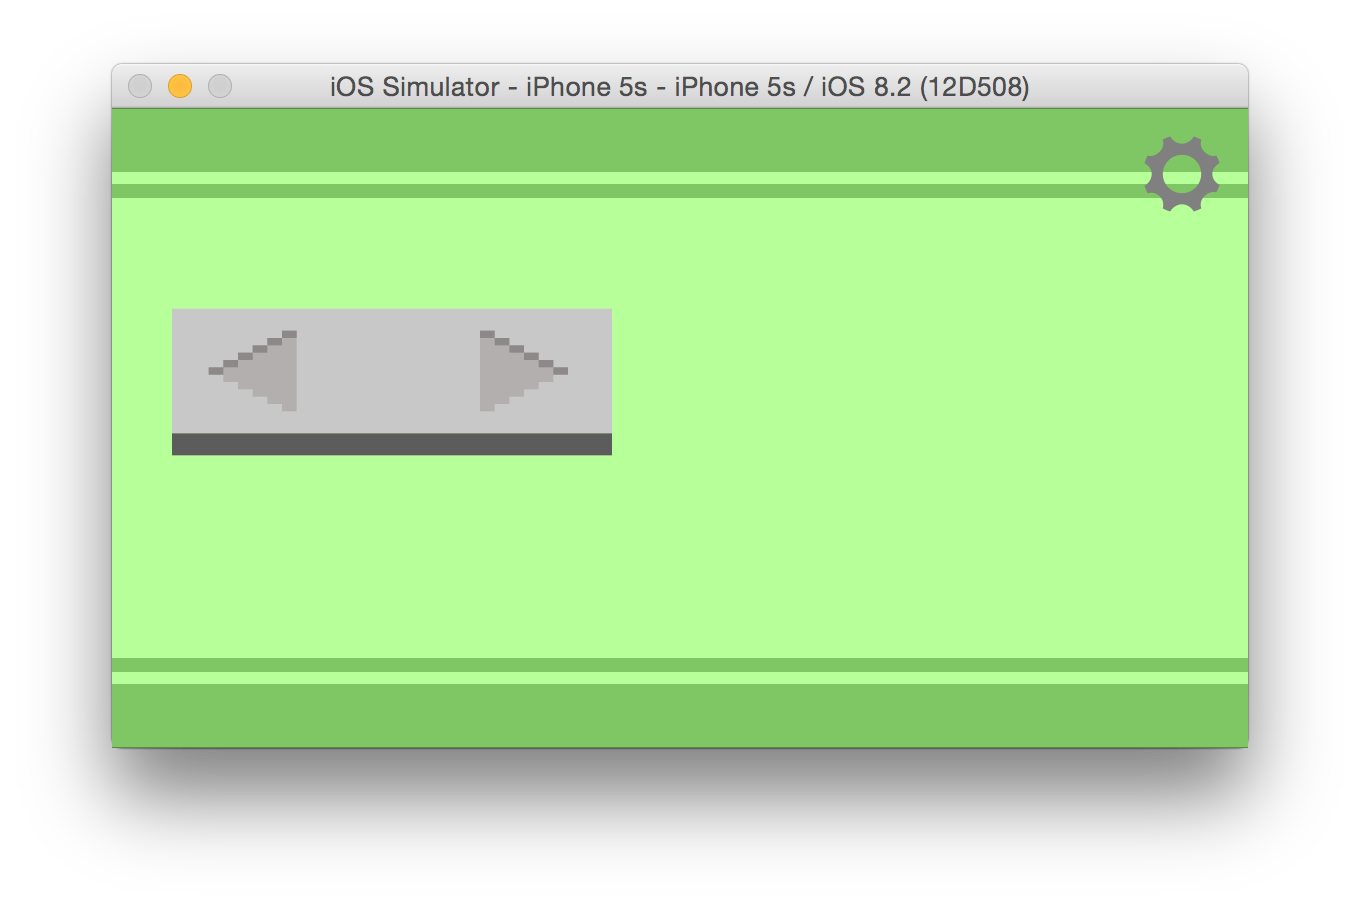
You can see for this sample we've select the 1lrpad-1button controller.
The other 3 checkboxes let you get orientation data from the phone. See below
HFTInput
Another script is the HFTInput script. The HFTInput script coordinates with
the HFTGamepad script to emulate the standard Unity Input class
Most places that you'd use Input you can use m_hftInput instead. See Below.
Whether you use HFTInput or not is up to you. HFTGamepad provides the real
gamepad support. HFTInput just looks at the data from HFTGamepad and
makes it look similar to the standard Input system.
BirdScript
BirdScript.cs is basically the same code from the unity tutorial
with a few additions for HappyFunTimes
Start
Our standard unity Start function looks up several components including the HFTGamePad and HFTInput components.
It then sets the color, get's the user's name, and sets up callbacks for if the user changes their name or
disconnets from the game.
private Animator m_animator;
private Rigidbody2D m_rigidbody2d;
private Material m_material;
private HFTGamepad m_gamepad;
private HFTInput m_hftInput;
private static int m_playerNumber = 0;

void Start ()
{
    m_animator = GetComponent<Animator>();
    m_rigidbody2d = GetComponent<Rigidbody2D>();
    m_material = GetComponent<Renderer>().material;
    m_gamepad = GetComponent<HFTGamepad>();
    m_hftInput = GetComponent<HFTInput>();

    SetColor(m_playerNumber++);
    SetName(m_gamepad.Name);

    // Notify us if the name changes.
    m_gamepad.OnNameChange += ChangeName;

    // Delete ourselves if disconnected
    m_gamepad.OnDisconnect += Remove;
}
Another thing to notice is that we have static m_playerNumber property. Because it's
static it is shared with all other BirdScript instances. We use that to help pick
a color for each player. We could just pick at random but I've found far too often
the colors come out too close so the code here that picks a color only picks from
one of 64 colors and it starts them out with very distant colors.
SetColor
Setting the color used for the character is a little funky. We're using an HSVA shader that lets us selectively adjust the hue, saturation, and value of part of an image based on a hue range. We need to know the base color of the character so we can then apply the adjustments to that color and calculate what the final color becomes. That color is set manually in Unity.
If that's not clear let's assume the Bird's default color is bluish. We then choose to adjust the hue by 0.5 giving us a red/orange. Without knowing that the base color is blue we couldn't know what color it will become after its been adjusted and so we would not know what color to send to the controller. Setting the base color to the color of the player's sprite graphics lets us comupte what color it will become.
Based on the player number which we use as colorNdx we pick a player color. The goal is to pick something
that is different from other players. To do that we reverse the least significant
6 bits which means instead of counting 0, 1, 2, 3, 4, 5, 6, 7, 8 we end up counting
0, 32, 16, 48, 8, 40, 24, 56, ... 6 bits means we have a range of 0 to 63 so dividing
by 64 gives us an amount from 0.0 to 1.0 to adjust the hue around the color wheel.
float hueAdjust = (((colorNdx & 0x01) << 5) |
                   ((colorNdx & 0x02) << 3) |
                   ((colorNdx & 0x04) << 1) |
                   ((colorNdx & 0x08) >> 1) |
                   ((colorNdx & 0x10) >> 3) |
                   ((colorNdx & 0x20) >> 5)) / 64.0f;
These 2 lines make every other set of 32 players be 50% darker and every other set of 16 players be 50% less saturated.
float satAdjust   = (colorNdx & 0x10) != 0 ? -0.5f : 0.0f;
float valueAdjust = (colorNdx & 0x20) != 0 ? -0.5f : 0.0f;
Hopefully that comes up with good colors.
The rest seems pretty straight forward. The one HappyFunTimes line
is m_gamepad.color = playerColor. Setting m_gamepad.color will
tell the controller to change to a matching color.
// get the hsva for the baseColor
Vector4 hsva = HFTColorUtils.ColorToHSVA(baseColor);

// adjust that base color by the amount we picked
hsva.x += hueAdjust;
hsva.y += satAdjust;
hsva.z += valueAdjust;

// now get the adjusted color.
Color playerColor = HFTColorUtils.HSVAToColor(hsva);

// Tell the gamepad to change color
m_gamepad.color = playerColor];

// Create a 1 pixel texture for the OnGUI code to draw the label
Color[] pix = new Color[1];
pix[0] = playerColor;
Texture2D tex = new Texture2D(1, 1);
tex.SetPixels(pix);
tex.Apply();
m_guiStyle.normal.background = tex;

// Set the HSVA material of the character to the color adjustments.
m_material.SetVector("_HSVAAdjust", new Vector4(hueAdjust, satAdjust, valueAdjust, 0.0f));
Note: The color is also available directly on the HFTGamepad as just color. You can see this in
the inspector as the game is running. Select a spawned player and adjust their color and you'll see
it affect both the game and their controller live.
Reading User Input
In the original tutorial there was
only 1 player and it used keyboard input. To read input from the phone we just reference
the m_hftInput as well.
So in Update
void Update()
{
    bool jumpJustPressed = m_hftInput.GetButtonDown("fire1") || Input.GetKeyDown("space");
    // If we're on the ground AND we just pressed jump (or space)
    if (m_grounded && jumpJustPressed)
    {
       ...
    }
}
And in FixedUpdate
void FixedUpdate () {
    ...
    // Get left/right input (get both phone and local input)
    float move = m_hftInput.GetAxis("Horizontal") + Input.GetAxis("Horizontal");
    ...
Reading both m_hftInput and Input is just there to make it easy to test, debug, and interate.
We can start unity, open a local browser window and go to http://localhost:18679. Once we do that
we can switch back to unity and just press the arrow and space bar to test the game's physics and stuff.
If we stop unity and start it again that local browser will re-connect automatically so we can continue
to test just using the keyboard.
LevelSettings.cs
The rest of the code in BirdScript should be clear to anyone that's used Unity much or
gone through the 2d platformer tutorial.
That example made an enclosed world. For me, instead, I just used a few locators. They are
attached to the LevelSettings.cs script which is attached to the LevelManager object.
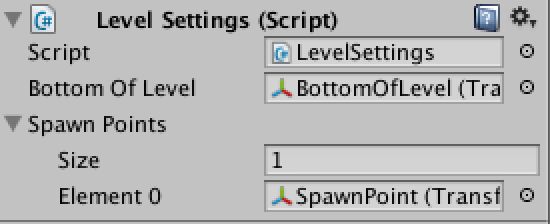
If a player falls below the bottomOfLevel locator then I just teleport them to spawn point.
For respawn points there is an array of spawnPoints. I only made one in this sample.
The code for LevelSettings.js adds a static accessor, settings. This means any other script
can access the global settings using LevelSettings.settings.<nameOfSetting>.
For example in BirdScript.cs we pick a random spawn point like this
void MoveToRandomSpawnPoint()
{
    // Pick a random spawn point
    int ndx = Random.Range(0, LevelSettings.settings.spawnPoints.Length - 1);
    transform.localPosition = LevelSettings.settings.spawnPoints[ndx].localPosition;
}
And in FixedUpdate we check for the players falling below the bottom of the level like this
if (transform.position.y < LevelSettings.settings.bottomOfLevel.position.y) {
    MoveToRandomSpawnPoint();
}
HFTInput
The HFTInput class tries to emulate the standard Unity Input class.
So, for every function and property in Input there's the corresponding one in HFTInput. For example
Input.GetButton("fire1")
vs
m_hftInput.GetButton("fire1");
Things like remapping and the Input Manager are not really relevant to HappyFunTimes. If you want to setup your own mappings you can call
m_hftInput.SpecifyAxisNameToAxisIndex(name, index);     // for axis controls
m_hftInput.SpecifyButtonNameToButtonIndex(name, index); // for buttons
For the correct indices see the next section.
HFT Gamepad API
The HFTGamePad script follows the HTML5 convention. I'm not sure there was a good reason
to keep it but this script is based on the HTML5 version of this gamepad
and it seemed like a good idea to keep the 2 as similar as possible so if new features are
added to one they can hopefully be easily copied to the other.
What that means is HFTGamepad has 2 public properties,
public float[] axes;
public Button[] buttons;
that work just like the HTML5 Gamepad API

Of course the 10 controller variations don't support all those buttons. What they do support are 2 dpads and 2 buttons plus a few extra things. Here are the constants
AXIS_DPAD0_X = 0;
AXIS_DPAD0_Y = 1;
AXIS_DPAD1_X = 0;
AXIS_DPAD1_Y = 1;
AXIS_ORIENTATION_ALPHA = 4;    //    0 to 360
AXIS_ORIENTATION_BETA  = 5;    // -180 to 180
AXIS_ORIENTATION_GAMMA = 6;    //  -90 to 90
AXIS_ACCELERATION_X = 7;       // meters per second left & right
AXIS_ACCELERATION_Y = 8;       // meters per second toward top and bottom of phone
AXIS_ACCELERATION_Z = 9;       // meters per second forward and back
AXIS_ROTATION_RATE_ALPHA = 10; // degress per second
AXIS_ROTATION_RATE_BETA  = 11; //
AXIS_ROTATION_RATE_GAMMA = 12; //
AXIS_TOUCH_X = 13;             // -1 to +1 across the screen
AXIS_TOUCH_Y = 14;             // -1 to +1 down the screen

BUTTON_DPAD0_LEFT = 14;
BUTTON_DPAD0_RIGHT = 15;
BUTTON_DPAD0_TOP = 12;
BUTTON_DPAD0_BOTTOM = 13;
BUTTON_DPAD1_LEFT = 18;
BUTTON_DPAD1_RIGHT = 19;
BUTTON_DPAD1_TOP = 16;
BUTTON_DPAD1_BOTTOM = 17;
Reading the DPads and or LRPads using HFTGamepad
So for example if you are using controller type 2dpads then you can use this to read DPAD0
m_gamepad.axes[HFTGamepad.AXIS_DPAD0_X]   // returns -1, 0, or 1
m_gamepad.axes[HFTGamepad.AXIS_DPAD0_Y]   // returns -1, 0, or 1
And this to read DPAD1
m_gamepad.axes[HFTGamepad.AXIS_DPAD1_X]   // returns -1, 0, or 1
m_gamepad.axes[HFTGamepad.AXIS_DPAD1_Y]   // returns -1, 0, or 1
Or you can also read the dpads as buttons with
// dpad0
m_gamepad.buttons[HFTGamepad.BUTTON_DPAD0_LEFT].pressed  // true if the user is pressing left
m_gamepad.buttons[HFTGamepad.BUTTON_DPAD0_RIGHT].pressed // true if the user is pressing right
m_gamepad.buttons[HFTGamepad.BUTTON_DPAD0_UP].pressed    // true if the user is pressing up
m_gamepad.buttons[HFTGamepad.BUTTON_DPAD0_DOWN].pressed  // true if the user is pressing down

// dpad1
m_gamepad.buttons[HFTGamepad.BUTTON_DPAD1_LEFT].pressed  // true if the user is pressing left
m_gamepad.buttons[HFTGamepad.BUTTON_DPAD1_RIGHT].pressed // true if the user is pressing right
m_gamepad.buttons[HFTGamepad.BUTTON_DPAD1_UP].pressed    // true if the user is pressing up
m_gamepad.buttons[HFTGamepad.BUTTON_DPAD1_DOWN].pressed  // true if the user is pressing down
LR pads work exactly the same except they only provide X and LEFT and RIGHT values.
Reading the Buttons
If you're using a controller with buttons they can be read with
m_gamepad.buttons[0].pressed  // true if the user is pressing blue button
m_gamepad.buttons[1].pressed  // true if the user is pressing red button
For the touch controller the values are normalized with 0.0 in the center and -1 to 1
at the edges. You probably want to choose some range smaller than that to actually use
because various mobile OSes like to do things near the edge of the
screen like switch apps or make various UI elements appear. You can read the values
at
m_gamepad.axes[HFTGamepad.AXIS_TOUCH_X]   // returns -1 to 1
m_gamepad.axes[HFTGamepad.AXIS_TOUCH_Y]   // returns -1 to 1

m_gamepad.buttons[HFTGamepad.BUTTON_TOUCH] // true if player is touching the screen
IMPORTANT! Optimize your controllers!
The touch controller is very data intensive since it is sending the position of the fingers from every player very quickly. For a small number of players, say 4 to 8 this is unlikely to be an issue. For a large number of players you should consider making a custom controller.
As an example lets say you wanted to make a hockey game where users touch the screen and then drag their finger in the direction they want their player to go. You send all the data to Unity and then compute things in Unity. It works but it's very inefficient.
Ideally in this case you would create a custom controller in JavaScript that reads the player's touch events, computes a direction and only sends the direction to Unity.
One direction per player is at least 50% less data than x and y per finger. You could even decide that for such mushy controls you only need to send the data at 10hz or even 5hz and players are unlikely to notice the difference. They are sliding on ice after all.
Even further you could possibly quantize the directions to 8 or 16 values instead of a fluid angle and send the direction only if it's different from the last time you sent the direciton.
All of these optimizations would go a long way toward making sure your game can support more players.
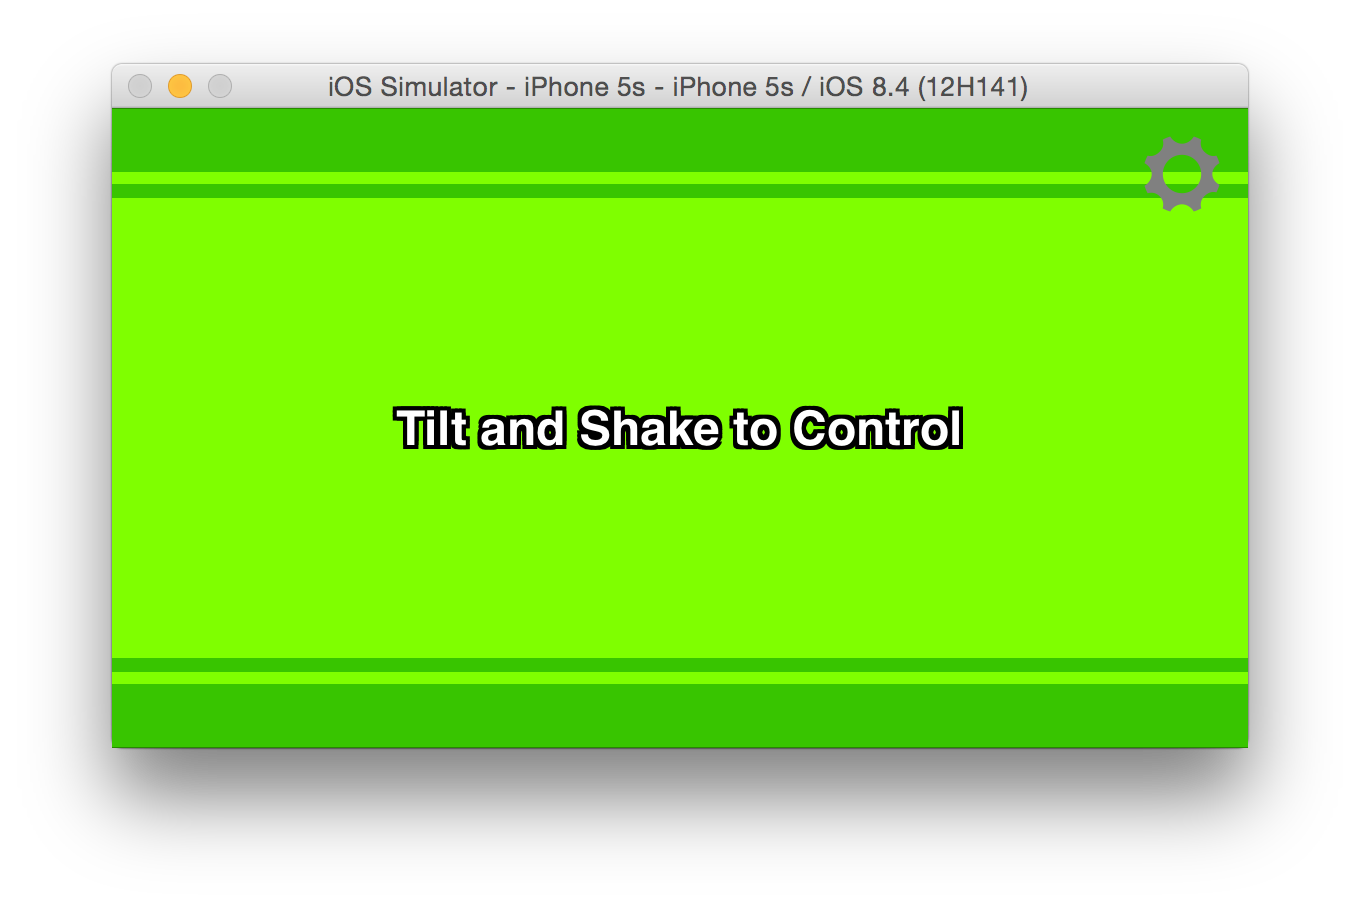
Orientation Data
If you check provideOrientation then the phone will start providing
orientation data.
Imagine the phone in portrait mode lying flat on a table. In that case.
m_gamepad.axes[HFTGamepad.AXIS_ORIENTATION_ALPHA] = y rotation. eg: rotation on table. Range 0 to 360
m_gamepad.axes[HFTGamepad.AXIS_ORIENTATION_BETA]  = x rotation. eg: lift the phone to face you or tilt away from you. Range -180 to 180
m_gamepad.axes[HFTGamepad.AXIS_ORIENTATION_GAMMA] = z rotation. eg: tilt the phone to the left or right. Range -90 to 90
If you check provideAcceleration then the phone will provide acceleration data.
All values are in meters per second squared. Note: different phones seem to have different sensitivities.
Imagine the phone in portrait mode lying flat on a table. In that case.
m_gamepad.axes[HFTGamepad.AXIS_ACCELERATION_X] = x motion: eg moving the phone left to right
m_gamepad.axes[HFTGamepad.AXIS_ACCELERATION_Y] = y motion: eg moving the phone away from you or toward you (forward and back)
m_gamepad.axes[HFTGamepad.AXIS_ACCELERATION_Z] = z motion: eg moving the phone above / below the table
If you check provideRotationRate then the phone will provide rotation rate data.
All values are in degrees per second. Note: different phones seem to have different sensitivities.
Imagine the phone in portrait mode lying flat on a table. In that case.
m_gamepad.axes[HFTGamepad.AXIS_ROTATION_RATE_ALPHA] = y rotation. eg: rotation on table.
m_gamepad.axes[HFTGamepad.AXIS_ROTATION_RATE_BETA]  = x rotation. eg: lift the phone to face you or tilt away from you.
m_gamepad.axes[HFTGamepad.AXIS_ROTATION_RATE_GAMMA] = z rotation. eg: tilt the phone to the left or right.
I haven't tested this but I suspect the various forms of orientation data use a lot of network bandwidth because they have to constantly send data where as most of the dpad, lrpad, and button controllers send very little data.
That means for example if you want to make game with 4 to 8 players and use orientation data it's probably fine but 50 players might be a little much. Similarly you should only turn on the data you actually need. Don't just check all 3 boxes if you don't need all 3 types of data.
See above about optimizing your controllers.
Also consider creative game design and making a custom controllers that do more orientation processing on the phone itself. For example lets say you were making a game like SpaceTeam and you wanted to know when the user shakes the phone (meteor) and when the user turns the phone upsidedown (warp).
The brute force way would be to send the orientation data and the acceleration data to the game. A ton of data would be sent from the phones to the game. But, rather, you could write some JavaScript that detects on the phone if the user shakes the phone or if the user turns it upside down. Then you just send commands that pass that info to the game. Sending only the yes/no info of whether the phone is upsidedown or not (true/false) and if the phone is currently being shaken (true/false) would be orders of magnitude less data.
See other samples about how to make your own controllers.
Setting the Color of a gamepad
You can set the color of a gamepad by setting HFTGamepad.color as in
m_gamepad.color = new Color(0, 1, 0); // make the gamepad green
Getting the Name of the User
m_gamepad.Name contains the user's name. If the user changes the name any callbacks
attached to the OnNameChange event handler will be called. For example in BirdScript
you can see
void Start() {
   ...
   // Notify us if the name changes.
   m_gamepad.OnNameChange += ChangeName;
And
// Called when the user changes their name.
void ChangeName(object sender, System.EventArgs e)
{
    SetName(m_gamepad.Name);
}
Changing the Controller Type
The controller starts in whatever type you set in Unity but if you want you can also change it at runtime. For example maybe you have a game that uses an LR-PAD while the player is running across the level but when they die you want to switch the controller to touch controls to let them control their spirit. You can do that with code like
m_gamepad.controllerOptions.controllerType = HFTGamepad.ControllerType.c_touch
Valid controllers types are
c_1button,
c_2button,
c_1dpad_1button,
c_1dpad_2button,
c_1dpad,
c_2dpad,
c_1lrpad_1button,
c_1lrpad_2button,
c_1lrpad,
c_touch,
Limiting the number of players
The sample has no limit to the number of players. The limit is only up to your networking equipment.
But, with these relatively large characters and small level you'll quickly find that if you have
too many players it gets impossible to play. If you want to limit the number of players set
the maxPlayers setting in the PlayerSpawner to something greater than 0.
If you look at the LevelManager you'll see that in addition to the PlayerSpawner script there is
also a HFTGamepadHelper script. That script is also needed to handle telling players
the game is full and they need to wait.
For example if you set maxPlayers to 2 and 3 people connect, the 3rd person's phone will
say "Game Full Please Wait". If one of the other players quits their phone will switch to the
current controls.
The PlayerSpawner calls SendMessage("WaitingNetPlayer") on its own GameObject. So as long
as there is some other script attached to the same GameObject that has a function called
WaitingForNetPlayer it will get called.
Look side HFTGamepadHelper.cs to see how it works. All it does is send a message to the controller
called "full". There isn't even any data.
Changing players manually
Imagine we set maxPlayers to 4 and we want it so that when a player dies they are taken
out of the game and the next player waiting is allowed to play. We could do that like this.
Edit BirdScript and change the code that check if they fall of the bottom to this
void FixedUpdate() {
   ...
   if (transform.position.y < LevelSettings.settings.bottomOfLevel.position.y) {
       // Return the player to the queue of waiting players.
       m_gamepad.ReturnPlayer();

       // Destory ourselves
       Destroy(gameObject);

       return;  // because we just destroyed ourselves lets not do anything else.
   }
BE CREATIVE
Once you get started please consider getting even more creative. and considering other ideas. Learn how HappyFunTimes works at lower-level so you can make your own controllers.