Character Selection
This is just one example. Selecting characters is a very game specific feature so it's hard to give a specific answer. Do you have just 2 characters? That's relatively easy as you can put 2 images of 2 characters on your controller. Do you have 50 characters? Well now you need to put 50 images. Since 50 images probably won't fit on the phone you're going to have to design some kind of selection UI. Do you want users to select clothing, weapons, armor? Now you're going to have to make a relatively complex UI on the controller and send all of the user's selections to the game. Do you want players to be able to change characters during play. Again that's up to you to create. HappyFunTimes will just let you communicate between the game and the controller/phone..
To keep it simple though here's one example of letting players pick characters.
Open the scene Assets/HappyFunTimes/MoreSamples/character-select/Scenes/HappyFunTimesCharacterSelectExample.
You can download this sample here.
The description below closely follows that scene.
Using the default PlayerSpawer script make a prefab that is just a single GameObject with
just one script. That script waits for a message from the controller as to which character
the player picked. It then spawns yet another prefab based on the player's selection and
passes the NetPlayer to that new prefab.
So for example here's a script.
// ExampleCharacterSelect.cs
using UnityEngine;
using System;
using HappyFunTimes;

class ExampleCharacterSelect : MonoBehaviour {

    public GameObject[] characterPrefabs = null;

    // Message received from controller about which
    // character the player picked.
    private class MessageCharacter {
        public int id = 0;
    }

    void InitializeNetPlayer(SpawnInfo spawnInfo) {
        // Save the netplayer object so we can use it send messages to the phone
        m_netPlayer = spawnInfo.netPlayer;

        // Register handler to call if the player disconnects from the game.
        m_netPlayer.OnDisconnect += Remove;

        // Setup events for the different messages.
        m_netPlayer.RegisterCmdHandler<MessageCharacter>("character", OnCharacter);
    }

    private void Remove(object sender, EventArgs e) {
        Destroy(gameObject);
    }

    private void OnCharacter(MessageCharacter data) {
        int ndx = data.id;
        if (ndx < 0 || ndx >= characterPrefabs.Length) {
            Debug.LogError("invalid charater selection: " + ndx);
            return;
        }

        // The ExampleCharacterSelect GameObject no longer
        // needs to care about m_netPlayer
        m_netPlayer.OnDisconnect -= Remove;
        m_netPlayer.UnregisterCmdHandler("character");

        // Create the character
        GameObject newGameObject = (GameObject)Instantiate(characterPrefabs[ndx]);

        // Send the netplayer to the character. We use a message
        // because then every character can have a differnet script if we want.
        newGameObject.SendMessage("InitializeNetPlayer", m_netPlayer);

        // We're done. Destory ourselves
        Destroy(gameObject);
    }

    private NetPlayer m_netPlayer;
}
Put it on an empty GameObject. Make it a prefab. Make the happyfuntimes PlayerSpawner spawn it.
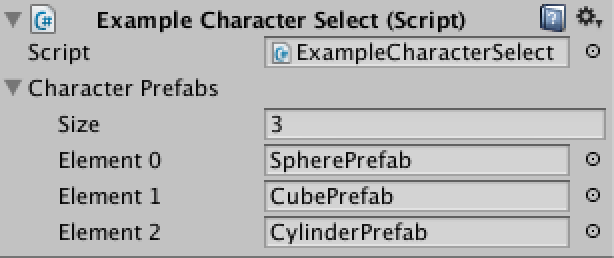
This script has an array of GameObjects. Put the prefabs you want spawned for each type of character in the slots shown in Unity
After that you need to make a controller that lets the user select a character and sends a message to the game about which character was selected.
I made one by modifying the simple controller.
Relevant HTML in Assets/WebPlayerTemplates/HappyFunTimes/character-select/controller.html
<div id="gamearea" class="fixheight">
  <h1 id="gamestatus">status</h1>
  <div id="display" class="hft-fullcenter fixheight">
    <div id="input" class="hft-instruction hft-fullcenter">Touch to Move</div>
  </div>
  <div id="inputarea"  class="hft-fullcenter fixheight"></div>
</div>
<div id="choose" class="hft-fullcenter fixheight">
  <div>Select a character</div>
    <div id="choices">
      <div id="choice0" class="choice"><img src="images/sphere.svg"></div>
      <div id="choice1" class="choice"><img src="images/cube.svg"></div>
      <div id="choice2" class="choice"><img src="images/cylinder.svg"></div>
    </div>
</div>
Relevent CSS in Assets/WebPlayerTemplates/HappyFunTimes/character-select/css/controller.css
#choose {
    z-index: 20;
    position: absolute;
    top: 0;
    left: 0;
    width: 100%;
    height: 100%;
    background-color: #444;
    color: white;
    font-size: xx-large;
    font-weight: bolder;
    font-family: sans-serif;
}
#choices {
    display: -webkit-flex;
    display: flex;
    -webkit-justify-content: space-around;
    justify-content: space-around;
}
.choice {
    width: 120px;
    height: 120px;
}
img {
    width: 100%;
    height: 100%;
    -moz-user-select: none;
    -webkit-user-select: none;
    -o-user-select: none;
    user-select: none;
    pointer-events: none;
}
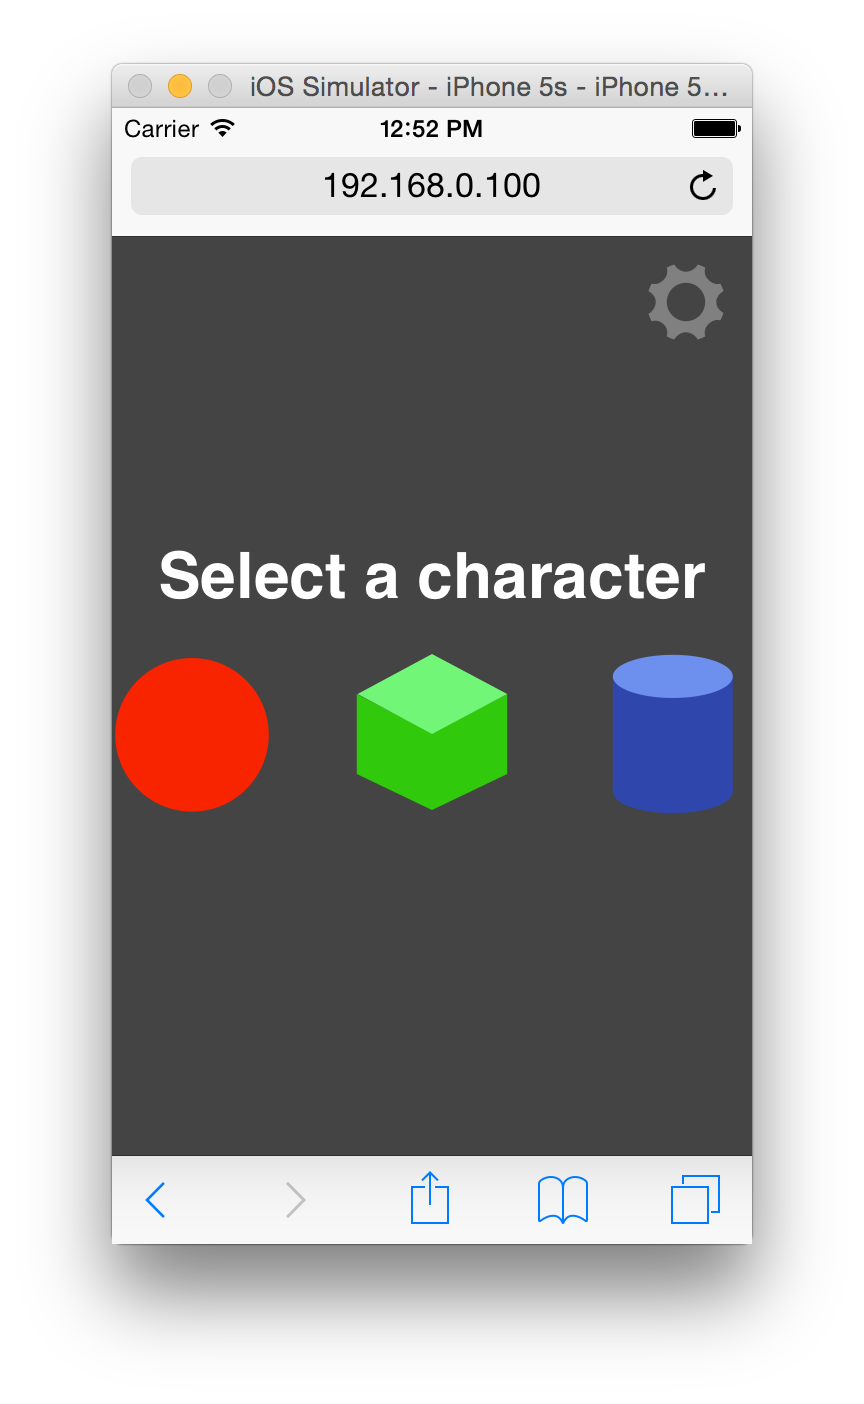
It shows up like this
I then added code to send which character the user selected. You can see it
in Assets/WebPlayerTemplates/HappyFunTimes/character-select/scripts/controller.js
It also hides the selection HTML which was covering up the normal game controls.
  function selectCharacter(id) {
    // only do this once
    if (choice < 0) {
      choice = id;
      // Send the character choice to the game
      client.sendCmd('character', { id: id });
      // Hide the choose HTML
      document.getElementById("choose").style.display = "none";
    }
  }

  var $ = document.getElementById.bind(document);
  $("choice0").addEventListener('click', function() { selectCharacter(0); });
  $("choice1").addEventListener('click', function() { selectCharacter(1); });
  $("choice2").addEventListener('click', function() { selectCharacter(2); });
  $("choice0").addEventListener('touchstart', function() { selectCharacter(0); });
  $("choice1").addEventListener('touchstart', function() { selectCharacter(1); });
  $("choice2").addEventListener('touchstart', function() { selectCharacter(2); });
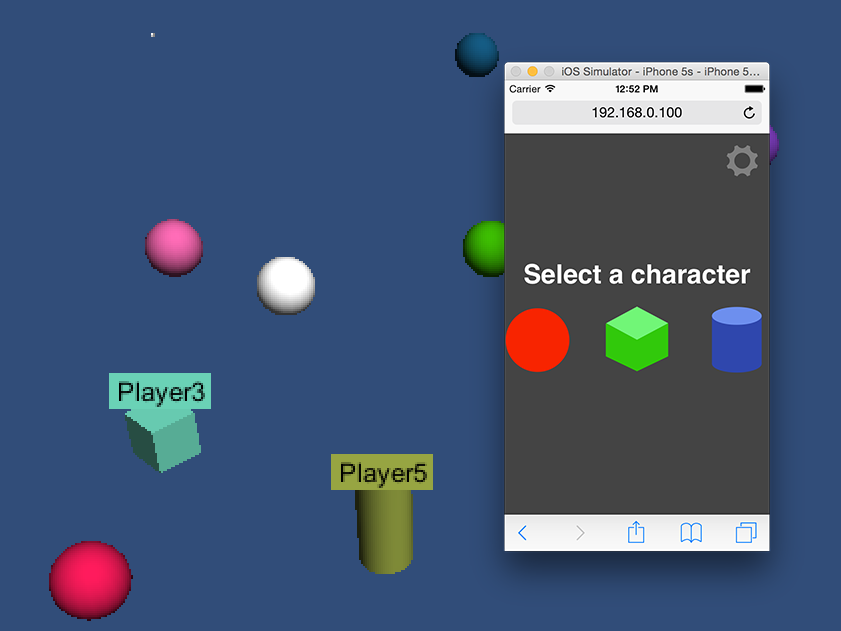
Run the scene Assets/HappyFunTimes/MoreSamples/character-select/Scenes/HappyFunTimesCharacterSelectExample
to see it work.